07 November 2009

Roasted Potato and Fennel Salad


One of my favorite recipes, very loosely adapted from (more like inspired by) a recipe in Cooks Illustrated for roasted potato salad with salsa verde.

Step 1: Potatoes

2 lb small red-skinned potatoes or small Yukon gold potatoes, washed and cut into ¾ inch chunks
Extra virgin olive oil
Kosher salt and freshly ground pepper

Preheat the oven to 450 F / 250 C. Spread the potatoes on a heavy duty rimmed baking sheet (lined with foil, if available – makes cleanup easier). Drizzle with olive oil and kosher salt and pepper, and toss to coat. Make sure the potatoes are well coated with oil but not drenched. Spread the potatoes out into a single layer and roast until tender when pierced with a fork, about 20-30 minutes, depending on the size. Check and stir the potatoes once during roasting. When potatoes are done, transfer them to a large serving bowl and scrape all the toasty bits off the pan.

Step 2: The other stuff

1 medium fennel bulb

Cut the top and the bottom off the fennel bulb. Slice the fennel in half from top to bottom. Slice crosswise as thinly as possible. Add fennel to the bowl with the potatoes. Keep the fronds.

Salsa Verde:
½ c chopped fresh flat-leaf parsley
Reserved fennel fronds from fennel, chopped
1 medium shallot, chopped
2 T fresh orange juice or lemon juice
1 T white-wine vinegar or Champagne vinegar
1 T rice wine (mirin)
1 T honey (if needed for sweetness)
¼ c extra-virgin olive oil
kosher salt and freshly ground pepper

In a medium bowl, stir together the above ingredients and season with salt and pepper to taste. Add the dressing to the bowl with the fennel and potatoes and toss well to combine. Check for seasoning and serve.

Balsamic Roasted Green Beans, Roasted Butternut Squash, and Spinach Tortelloni with Butter and Sage

Here's the basics of this easy weeknight dinner:

Green Beans
Either buy a package of trimmed green beans or about a pound of bulk beans. If you buy the latter, snap the ends off. Wash the beans, dry them and lay out on a baking sheet lined with foil. Thinly slice one red onion for each pound of green beans. Thinly slice 2 or 3 garlic cloves for each pound of green beans. Season with coarse salt and pepper, drizzle with olive oil, and roast at 425 for about 30 minutes, stirring once. When the beans are done, drizzle with balsamic and stir while still on the baking sheet to loosen all the brown bits (deglazing, essentially).

These beans are fabulous cold or reheated the next day.

Squash
Cut up one medium-sized butternut squash into cubes. Cut one sweet Spanish onion into chunks. Toss with salt, pepper and olive oil on a baking sheet and roast at 425 for about an hour, stirring once or twice. Be sure that the squash is caramelized but not burned.

This is also delicious reheated and smooshed onto bread.

Tortelloni with Butter and Sage
Be a cheater: buy a package of spinach and cheese tortelloni, but buy the good stuff. Cook it in boiling salted water. Melt a stick of butter in a saucepan. Sprinkle with salt when the foam subsides. Let it brown a bit, if desired. Add the sage leaves and sizzle for 1 minute. Add the drained tortelloni and toss it around in the butter. Done!

10 October 2009

Chocolate Chip Cookies

Short but sweet: if you make them, they will come. That is: if you eat cookies, people will come...to eat them!!


Generously inspired by and adapted from the Tollhouse Cookie Recipe.

2 1/2 cups all-purpose flour
1 1/2 tsp baking soda
1/2 tsp salt
2 sticks butter, softened
3/4 cup brown sugar
3/4 cup white sugar
2 eggs
1 tsp vanilla
a lot of chocolate chips

Preheat the oven to 350.

Combine the flour, baking soda and salt in a bowl.

Beat the butter and sugar in stand mixer on high until light and fluffy. It should take about 10 minutes; scrape the bowl several times.

Add the eggs one at a time while mixing slowly, just until incorporated. Add the vanilla.

Add the flour mixture in a few batches while the mixer is on low speed. When everything is incorporated, add the chips and mix with a spatula.

If the dough is really soft, chill in the refrigerator until slightly more solid. This way the cookies won't spread too much.

Drop about a tablespoon of dough on an ungrease cookie sheet. Fill the sheet with 12 dough balls. Bake in the oven for 10-12 minutes or until just golden brown. Do not overbake - the cookies will continue to cook for about a minute after they are removed from the oven.

Enjoy!!

06 October 2009

Life Is Souper

The minute I exited the airport in Chicago, I smelled it. Diesel? No: Fall!

The scent of fall in the midwest is distinct. It's a swirl of fresh and musty, life and death, change encapsulated in an ephemeral whiff. Leaves darken and brighten, sleeves are supplemented with jackets, then scarves and hoods, the whole system preparing itself for the onslaught of freezing winter but celebrating with a big blast of color before it all turns white and gray.

Since it all must go back to food, I bring you my favorite harbinger of fall: soup. My mom bought all the ingredients for this minestrone and had them sitting on the counter when I walked in the door. This is my mom in a nutshell: "Welcome home! I love you! Now cook!" And gladly, with love, I eagerly grab her always-sharp knives and tear into the mountain of vegetables on the butcher block. That's another thing: making soup is a great way to vicariously hack away at whatever seems to deserve it.

Here's the recipe, to be doubled, tripled, or adapted at will. This makes about 6 quarts.

Minestrone Soup

6 Tablespoons olive oil
2 large leeks, thinly sliced, white and light green part only
4 carrots, chopped
2 zucchini, sliced in half lengthwise and then in slices
8 ounces green beans, halved
4 celery stalks, thinly sliced
12 cups vegetable stock (or chicken stock) (3 cardboard containers of, i.e., Pacific Brand)
2 14-ounce can chopped tomatoes (San Marzano, if you want the best flavor)
2 Tablespoons chopped fresh basil
2 teaspoons chopped fresh thyme or ½ teaspoon dried thyme
2 14-ounce can cannellini beans
1 cup macaroni (small elbows)
Salt and freshly ground black pepper
Freshly grated Parmesan cheese and chopped fresh parsley, to garnish


1. Heat the olive oil in a large dutch oven or soup pot, add all the fresh vegetables and heat until sizzling. Cover the pan, lower the heat and sweat the vegetables for 15 minutes, shaking the pan occasionally.
2. Pour in the stock and add the tomatoes and herbs with salt and pepper to taste. Bring to a boil, replace the lid, then simmer gently for about 30 minutes

3. Add the beans with the can liquid, then the pasta. Simmer for about 10 minutes. Check the seasoning and serve with the Parmesan cheese and parsley

28 July 2009

Rice Balls

Sometimes you want lunch to be easy. Oh, did I say lunch? I meant life. But in the meantime...

Make rice balls!

What's more fun than an edible ball that you can pick up with your hands, bite into and find magic inside? Nothing! Hostess cupcakes mastered this art but can, like many nostalgic food products, lead to regret when revisited later in life. See also: Ding Dongs and Hot Pockets.

But the Japanese have got this area covered. Though some venture into ridiculousness I do have to bow in respect. I can't really venture to call my rice balls "onigiri", as that would be like calling half-thawed, partially cooked fish sticks "sushi". But I like to imagine myself stumbling up to the pantheon of rice gods to one day stand upon their big toes, if not their shoulders.My recipe, very loosely adapted (more like "inspired by") Harumi Kurihara's "Harumi's Japanese Cooking" and my friend Mandy.

Shiitake Mushroom Filling
Fresh shiitake mushrooms -- about 3-4 ounces
3 T soy sauce
2 T rice wine / mirin

Clean the mushrooms, remove the stems and slice thinly. Put in a saucepan with the soy sauce and rice wine. If it looks like they need more liquid, add more but keep the proportions the same. Bring to a boil, reduce to a quick simmer, and cook until the mushrooms have absorbed all the liquid. If you like spicy, add the spice sauce of your choice.

Rice
I made one rice cooker cup of short grain brown rice in the rice cooker. If you do it on the stove, good luck, and make about 1/2 cup dry rice (which yields 1 to 1/2 cups cooked rice).

Balls
Take a piece of plastic wrap and put it on your work surface. Using a spoon (dipped in cold water if you really want to), pat out a spoonful of rice to about a palm-sized circle. The rice should be a thin but smooth layer. Place about a teaspoon of mushroom filling in the center, then gather the plastic wrap and bring the whole thing together into a ball. Squeeze or cinch the plastic wrap to smoosh the rice into place. Repeat until you have used all the rice or all the filling, whichever comes first. Mine would have made about 8 rice balls but I ate a bunch of the rice when it first came out. 4 rice balls per person, if accompanied by other stuff, should be plenty.

Sprinkle the top of the rice balls with Japanese rice seasoning of your choice, if you want to get all fancy schmancy like me.

27 July 2009

Fun With a Japanese Slicer

I'm about to reveal a little secret. Get ready...get really, really ready...

(I see you leaning into the computer there!)

The best kitchen tool I've bought yet cost me all of $2.50 at the Japanese grocery store.

Ok, that's a bit of a lie. My Santoku knife is actually the best tool ever, which I bought for $80 at Williams-Sonoma (full disclosure: ex-rockstar-teenage-employee of WS) and my second best tool is the rice cooker my mom bought me for Christmas. Or intended to buy for Christmas but knew how excited I would be so gave it to me early (thanks Mom!). But the best NEW tool is the Japanese 4-in-1 slicer. It grates, crinkle cuts, purees (for garlic and ginger) and slices paper thin. I had oodles of fun with it this weekend slicing up cucumbers and grating daikon. I wish it grated more like the food processor julienne blade, but hey, we can't ALL be ex-WS employees with a 40% discount, now can we?

Japanese slicer + Harumi Kurihara's "Harumi's Japanese Cooking" + delicious fresh ingredients = Salad of Many Shapes and Textures with Peanut Miso Dressing!


Recipe (but feel free to vary as your slicing desires take over)
2 carrots, peeled
1 small daikon (6 inches long)
1 small cucumber
A handful of shiso leaves (sub arugula or another spicy green, but shiso is amazing and my newest addiction)

1 T teaspoons miso
1 T unsweetened peanut butter or tahini
a squirt of Sriracha
1 T soy sauce
1 T rice vinegar
a bit of warm water - add 1 T at a time

Using the vegetable peeler, make carrot ribbons. (The slicer failed me on the carrots). Grate the daikon as finely as possible. It should resemble daikon snow. Slice the cucumbers as thinly as possible using the slicer blade. If the cucumbers are especially wet, pat them dry with a paper towel. Wash and dry the shiso or greens and scatter then around. The greens are more of a garnish than a salad base but make a nice textural and flavor contrast, especially the shiso. This would be good with regular lettuce, though, if that's all you have.

Mix the miso, PB, sriracha or hot sauce, soy sauce and rice vinegar in a small bowl. Add a bit of warm water just to make everything come together. Add a bit more to make the dressing liquidy but not too thin. You want it to be pourable but not watery. Assemble your salad in whatever way you prefer and pour the dressing over. You might have more dressing than you need, but that's better than less.

This should be enough for one very big salad (like for a raw foodist or a hungry vegetarian) or two smaller salads.

What Do To With Mushy Figs

When I lived in Brazil, I used to get boxes of figs for R$2,50 during the fig season. Thats ten gorgeously plump, perfectly ripe, bursting with figgyness figs for about a dollar (at least when I lived there). My search for cheap and luscious figs became almost obsessive, and I would scorn the fool who tried to pawn a R$4,00 or even R$5,00 box off on unsuspecting amateurs. These delicious Brazilian figs remain elusive in America, where supermarkets can get away with charging $5 or even $8 for four shriveled little figs that resemble the unmentionables of those not of my gender. Gross. That image alone was enough to shake my addiction (but I'm sorry if it put you all off figs forever, if Sex and the City hadn't already done so).

But my latent addiction was awakened briefly at the sign of some plump, sprightly little Mission figs at my local Whole Paycheck. I caved...I bought them...coveted my little purchase like a prize fighter...I at least waited until being outside to dig in.

And promptly spit that slimy mass of tasteless seeds all over the sidewalk!

But now, I find myself with a basket of tasty-looking (but not tasty-tasting) figs and, true to frugal form, can't bring myself to throw them away. While brewing a big batch of hibiscus tea, the thought came to me. I love that ridiculously expensive fig-black pepper compote that was regularly sampled at the Ann Arbor Whole Paycheck, and the floral depth of hibiscus might compensate for the lack of decent balsamic vingar in my kitchen. Into another saucepan go diced figs, a glug of hibiscus tea, a squizzle of honey, a pinch of salt and a few (very few - like 5) black peppercorns. Set it to simmer, stir frequently while enjoying a cup of hibiscus tea (or hibiscus sangria, if you roll that way) and wait until the mixture is thick and the figs have melted into a rich fruity mess.

So delicious! Shown here with my obscenely self-congratulating meal of Acme Bread green onion slab, Barely Buzzed Cheddar from Beehive Cheese, and a glass of $9 screw-top Carmenére with a fancy schmancy label.

What Not To Do To Eggplant

Regret. Not a sweet feeling. Especially for something that should have been so wonderful and was just so...bittersweet.

Get your mind out of the gutter! I'm talking about eggplant! Or rather, an unfortunate encounter with the remants of my fridge.

Arriving home one night, starving, slightly inebriated from a post-work celebration, I decided to cook some eggplant. Mind you, I love eggplant, and have made eggplant converts out of the most adamant of foes (see "Eggplant Faux-Baba"). But tonight was a Fail with a capital F -- worthy of the eponymous blog.

It all started with an open bottle of beer in the fridge. Not mine -- well, I bought the beer -- but a less than courteous houseguest who thought that fruit flies wouldn't proliferate in the cold. Well, news flash, they do. But being ridiculously frugal, I thought, "Hey, why not try to cook with it?" Images of beer-steamed grilled corn and beer-battered fish and beer-molasses baked beans danced in a slightly blurry way before my eyes. For some reason I had the idea that the English do some weird stew with meat, cheese and beer (which they probably do, by golly, but I haven't the faintest idear of the receipt). Sub in eggplant for meat, add some garlic, pour the beer over the browning eggplant and let it simmer until the eggplant is cooked.

Herein lies the rub: that wonderful Japanese eggplant I swoon over cooks really quickly. And beer evaporates slowly. And melting Rogue Creamery Stout Cheddar into the mix didn't help matters. I ended up with a creamy eggplant-beer soup. That tasted like bitter eggplant, hoppy beer and sharp cheese. One of my few creations that actually tastes worse than the sum of its parts.

Let this be a lesson to you, readers! Cook not when thou hast imbibed. Thou shalt regret it much earlier than morning.

23 July 2009

Hey Frittata, I'm gonna beet you up!

You heard me. Frittata, it's about time you got a shakedown. For too long you've been relying on spring vegetables and goat cheese and roasted red peppers. Why not embrace the dark, (calcium)-rich, magenta side of life? You've been satisfying yuppie taste buds for so long with your creamy, overly sweet and fluffy flavors. Get with the bitterness, man. Let it out.

And you, beet greens. Stop diving into the compost bin before your south-of-the-border counterparts can leave their (hand-staining) mark. Stick around and live up to the reputation of your admirable cousin, chard. (Don't try to pick a fight with the Swiss one, though). Live a little. Mix it up, outside the context of garden juice.

This frittata is not nearly as sassy as I wish it were but it's definitely delicious, and you'll now have something to do with all those beet greens. Since I know you all roast your own beets. Cuz, you know, how can you recreate that ubiquitous goat cheese (there it is again!), beet, spinach and candied walnut salad at home?

Beet Greens, Ricotta and Parmesan Frittata

Beet greens from a bunch of 3-4 beets, fat stems discarded, washed and drying while you prep the other ingredients
1 shallot or 1/4 of a red onion, very thinly sliced
2 cloves garlic, minced
salt
olive oil
3/4 - 1 cup fresh ricotta
4 eggs, or up to 6 if you really love eggs
1/4 cup milk or soy milk or cream if you want to go down that road
1/2 cup or more freshly grated Parmesan

Grab a few washed beet greens, roll them up like a cigar and julienne cut from end to end. You are essentially shredding the greens in a very easy way. (Anyone who has been to Brazil, this is how you do couve). Repeat until they are all shredded. Heat some olive oil in a pan and let the shallot warm in the oil. When it starts to sizzle, soften and brown, add the garlic and saute until fragrant. Add the beet greens, sprinkle with salt and give them a stir.

While the greens are softening up, beat the eggs with the milk in a bowl until pretty frothy and well mixed. Stir the greens after breaking every few eggs. When the greens are cooked but not completely killed (i.e., not like southern collards), turn off the heat and stir in the ricotta. Let the greens cool a bit, then combine with the eggs and pour into a small greased baking dish. Small = 8"x8" at max. If you want a bigger frittata, just double everything, or use a lot more eggs for a much eggier and less vegetablely frittata.

Sprinkle the entire top with grated Parmesan. Bake at 400 for about 10 minutes and lower the heat to 350 and bake for about 45. The frittata is done when the top is puffy and browned and a knife inserted comes out relatively clean (not liquid-covered). The frittata will collapse but is delicious warm, cold or reheated.

Lemongrass Mint (Iced) Tea

Scenario 1: Fortune bestows upon you a big bunch of lemongrass for $1 and an equally big bunch of mint, also for $1.

Scenario 2: Misfortune bestows upon you 115 degree heat with no sign of relenting for weeks. You and your friends are enjoying each other's company but melting under the oppressive hand of thermodynamics.

Scenario 3: Lemongrass and Mint Iced Tea rescues your molten, heat-stroked selves from the danger of devolving into a rendition of the "Great Gatsby Opera."

How, you ask, is such alchemy achieved by simply by lemongrass and mint? Here's how:

Take about 6-8 stalks of lemongrass for each 6 quarts of water (I think - a standard pot, but not as big as a pasta pot). Chop off the bottoms, peel off the outer layer (like a green onion), and chop into chunks about three inches long. Smack the chunks with the back of a knife to bruise them, which will let out more lemongrassy essential oils and flavors. Bring the water to a boil, toss in the lemongrass, and let it boil, mostly covered, about 30 minutes or until the infusion smells delicious and tastes sufficiently lemongrassy. When satisfied, turn off the heat and throw in a big handful of mint. If you can cover the mint, the infusion will retain more water and flavor. Let it steep for about 10 minutes at least, and up to a few hours. Strain the tea and chill for as long as necessary. Drink, revel in the refreshment, and vow to make this again, always.

Eggplant Faux-Baba

I love eggplant. If you don't, this post is not for you. If you think there is an inkling that you might, one day, embrace the violet orb, feel free to keep reading.

One of the many things I appreciate about Civic Center Farmer's Market is the abundance of Japanese eggplants. It is hard to find shiny, healthy Japanese eggplants if your community doesn't have the demand. Lucky for me, I live spitting distance from one of the most central, cheapest markets with the largest pan-Asian clientele. I was always skeptical about why Japanese eggplant was so much better -- is it just fetishized like Japanese animation? -- but after cooking with it for a while, realized how much softer, creamier, sweeter and generally more friendly to the cook it is (like anime, but not).

The following recipe emerged because I love baba ghanoush but hate paying for it. And, it tends to be loaded with bitter tahini and taste more like smlooch than like eggplant. It also emerged because a friend who hates eggplant came over when the only thing I happened to have in the fridge was eggplant and we were starving. Enter the ultimate challenge.

The recipe is more of a ratio because you can make as much or as little as you have on hand.

1 or more Japanese eggplants (if you have regular eggplant, use 1 for every 2 Japa's, unless your Japa's are Americanized and huge)
2-3 cloves of garlic, peeled, for each eggplant
a sprinkling of red pepper flakes
a minimal sprinkling of cinnamon - like a pinch
some olive oil
some salt
1-2 Tablespoons tahini (stir it first, please)

Preheat the oven to 375. Cut the eggplant into chunks about 1 in. square. Put them in a roasting pan and add the garlic cloves (whole), the red pepper flakes and the cinnamon. Drizzle the whole thing with some oil, maybe 1 Tablespoon. Japanese eggplant soaks up less oil than regular eggplant so you need less. Sprinkle with some salt, toss again, and roast for 30-45 minutes, stirring every 15 minutes to be sure the eggplant doesn't stick to the pan. The eggplant is done when it is soft all the way through, melts in your mouth when tasting (blow on it first!) and when the garlic is soft.

Put everything into a bowl and smoosh until you can't smoosh no more. Add the tahini and magically everything will transform into a creamy faux-baba. Stir a bit more, add seasoning if necessary, and indulge.

05 April 2009

Chez Panisse Magic

Wow. It has been a long, long road since my last post. Literally: I found myself in New Jersey, NYC, San Francisco, Berkeley, back to NYC, with a quick stopover in Vermont before heading to Chicago and finally back to Michigan. It was a long three weeks, but filled with friends and deliciousness!

To start off the amazing food journey, I wanted to share the revelatory meal I had at Chez Panisse. Jimmy and I trekked out to Berkeley on St. Patrick's Day and indulged in a feast of green. I wish I had the actual menu from the day but my attempt at recreating the names will have to suffice. Everything is local, organic, etc - but I can't remember the names of the farms and such from which ingredients were sourced.

1) Local halibut tartare with shaved fennel and lemon vinaigrette
2) Roasted golden and red beet salad with baby lettuces and green goddess dressing
3) Roasted squid with arugula and gremolata
4) Blanched asparagus with capers, parsley, egg and mustard vinaigrette

We sat in a little room off the main dining room on the second floor, where the café is located. Doused in sun with a clear view of the Golden Gate Bridge, we were like two cats napping in the afternoon. Except it was morning, we are human, and at least our taste buds were wide awake.

07 February 2009

Fennel Explosion Part I

Fennel is quite possibly one of the most versatile foods. Raw, it is great in salads or a a dipper. Chopped finely and sauteed, it makes a great base for sauces. Roasted, it caramelizes into a meltingly sweet, crisp-tender revelation. And the fronds are perfect for garnish, salad dressings and pestos.

So today, I decided to make fennel three ways: roasted, raw and pesto-ed.

Inspired by a tart my mom made with roasted butternut squash, fennel and gorgonzola; my love for all things roasted and vegetable; and a hankering for something warm and welcoming to come home to at night (in lieu of a man), I made Roasted Fennel and Butternut Squash Soup.

1 fennel bulb, sliced
1 butternut squash, sliced into rounds, then sliced in half again
2 onions, quartered, then quartered again
4 cloves of garlic
a 2-inch chunk of ginger (if you like a bit of heat; if you like sweet, leave it out)
Coarse salt
Olive oil
1/2 cup fennel fronds, finely chopped

Preheat the oven to 400. Toss the fennel, squash, onions, garlic and ginger together with olive oil to coat. Season to taste with coarse salt. Pour the mixture into a baking dish or two, or onto sheet pans - as many as necessary to fit everything. The vegetables can be crowded but should be in one layer. Cover tightly with aluminum foil and bake for about 20-45 minutes, depending on the pan. Shallower or darker pans will require less time.

When the squash and fennel are tender, remove the baking pans. Transfer the contents, including any juices, to a food processor. Let cool for a few minutes, then process until smooth. Add the fennel fronds and process just to incorporate. The soup should be thick but not pasty; if necessary add broth to thin.

Makes about 4 servings.

28 January 2009

Rice Cooker Deliciousness

My rice cooker and I have gotten quite close lately. To paraphrase "A Mighty Wind", I start with a little bitty idea of what might taste good together, and the rice cooker brings it all together, developing flavors and textures to make a big, big idea! Case in point: the other day I threw in equal proportions of brown lentils and brown short-grain rice, plus a clove of garlic, and two hours later a warm, nutty, perfectly cooked pilaf emerged. I tried replicating the dish on the stove and ended up with overcooked lentils, undercooked rice and a burned pot bottom. Yes, the rice cooker is indeed magic.

So, in the spirit of easy, tasty meals, I rummaged through the fridge and my imagination. Lentils and rice were awesome, and I wanted a variation on that theme. One rice cooker cup of each into the bowl. The other day I made a chopped salad of apple, celery, rosemary, lemon and cheddar, for which I'll post the recipe later. The last apple and the last few stalks of celery got chopped up and thrown in with the lentils and rice. Going for the whole sweet/savory contrast, I added about a tablespoon of maple syrup and 2 of soy sauce. Finally, a few whole black peppercorns (ground is fine too) and a tiny pinch of salt. Add water, close the top, push the button and let "twinkle twinkle little star" signal the start of culinary magic. (yes my rice cooker plays TTLS).

Oh...my...god. This was SO good when it first came out - soft like a pilaf, with the apples and celery melting into the mixture but offering a hint of sweet and tang. The lentils and rice were even nuttier with the added acid and undertone of earthy soy sauce. A faint hint of maple also added earthiness and sweetness. I wrapped a warm scoop into a fresh tortilla and chowed away.

Then the next day...and the next...it just got better. Reheated with a splash of water to create steam, it seemed like the flavors melded as the days went by. If you were to serve this as a side dish, or as a component to a meal, I would recommend making it the day before, or letting it rest a bit before serving. It's so delicious, cheap and easy!!

Midnight Gourmet

What do you do when it's 11 pm and you realize you forgot to eat dinner? Or rather, when you're hanging out with others and everyone suddenly realizes they are hungry? Raid the fridge! .... which usually means throw a bunch of stuff into a casserole, top with grated cheese and serve with tortilla chips. Ew. Not my style.

I had the following: a bunch of spinach, half an onion, a fennel bulb, and a little chunk of gorgonzola. What to do?

Slice up the fennel, drizzle it with olive oil and munch while thinking...Oh, and save the fronds.

Boil water for pasta and grab some farfalle (the little bowties). Those tend to grab sauce, so....

Caramelize the onion! Such a great way to add flavor to anything. Caramelized onions are a perfect balance between sweet and savory, and they pair well with just about anything. So, while munching on fennel, I sliced up the half onion and tossed it into a saucepan with some olive oil and a pinch of salt. Let it do its thing while the water comes to a boil.

Wash the spinach, and if using mature spinach (as opposed to baby?) chop coarsely. Cut the gorgonzola into cubes or crumble it.

By now the water should be boiling and the onions should be getting toward caramelized. Salt the pasta water and add the pasta. Splash the onions with a bit of balsamic and let it get all nice and soupy. When the pasta is about 2 minutes from done, add the spinach to the onions and toss around until it wilts. When the pasta is finished, take it directly from the pot to the pan with the onions and spinach. Toss, adding the gorgonzola and mixing until all is melty and well combined. Serve immediately, preferably with amazing red wine.

With this I happened to have a bottle recommended by my friend the wine guy: Atteca "Old Vines" 2007. Super complex, rich berry flavor, hinting at a bit of smokey chocolate. It went really well with the pasta, I'll say that.

12 January 2009

Hum...must...eat...HUMMUS!

Hummus is the darling of vegetarians and vegans. A classic dip originating in the middle east, this simple chickpea and tahini spread has spawned countless variations -- some excellent, some hideous -- now available at your corner yuppie market. Supermarket hummus is usually whipped into the same textureless airy foam as double-whipped cream cheese and filled with all sorts of unnatural stabilizers and flavoring agents. And the real flavors - pungent garlic, nutty chickpeas, bittersweet sesame - are lost.

But fear not! Hummus is easy to make at home, and I love it. I started making it with canned chickpeas and then discovered the wonders of cooking your own. When I lived in Brazil, I bought fresh(ish) tahini from the lebanese markets and chickpeas in bulk from what we (or maybe our parents) would call greengrocers. The basic recipe goes as follows:

Soak about half a pound of chickpeas overnight in water to cover.
Drain and rinse.
Cover them in clean, cold water in a big stockpot, at least six cups. Chickpeas absorb quite a bit of water so make sure they are well submerged. Bring to a boil, then lower heat and simmer for about two hours, or until they are tender and almost falling apart. They should be chewable but not mushy.
Note: Observe the smooth texture of home-cooked chickpeas. They aren't as tough and grainy as canned.

Drain the chickpeas but reserve a bit of the liquid, about a cup or so. Using a food processor or a blender, chop a clove or two of garlic with a bit of salt. Add the chickpeas and pulse to blend until crumbled. Add 2-3 tablespoons of tahini, or more if you really like the sesame flavor. I've added up to 1/2 cup before - it makes it a lot creamier, but also adds fat and calories (albeit the "good" kind). Blend until creamy-ish, then with the motor running (if possible) add some of the cooking liquid. Blend until almost the desired consistency, then blend in a few tablespoons of olive oil. Taste for texture, balance and seasoning. Add more salt, tahini, oil or cooking water as desired.

11 January 2009

A Sinfully Delicious Way to Start the Weekend

This story develops backward. I promise, I will arrive at said sinfully delicious weekend starter. But first...how NOT to bake cupcakes:

Since my big oven was broken, and I didn't have a half-size cupcake pan for the mini oven, I thought, "Why not try out those silicone cupcake molds that have been hiding in my cupboard?" DON'T DO IT! They were burned out the outside and mushy-raw on the inside. What a disappointment.

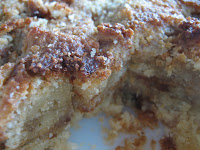
But, throwing away cupcakes is a mortal sin (see, here's where the "sinfully" part of "delicious" comes in). So when they were cool enough to handle, I mushed them up, added cinnamon, sugar, an egg and some cream, and baked them all together in a mini casserole. Enter deliciousness:
Kind of like monkey bread crossed with coffee cake, but SO much better! Crunchy cinnamony goodness laced throughout fluffy, creamy-chewy cake.

Hello Hello

This is my blog. I love food. I read cookbooks for fun. I write menus like some people write in their diary. The smell of fresh herbs freaks me out. I've been known to devour a bag of farmers market tomatoes on the ten minute walk home.

This blog will be a melting pot (no pun intended) of culinary musings, food creations and fresh-from-the-dirt disoveries. Comment freely, test my recipes and offer suggestions. Invite me out to eat, if you please, or better yet, invite yourself over. The kitchen is open.